

IBM WAS 9.0 Deployment
To deploy Webswing to WAS 9.0, follow these steps. The example below installs the distribution in /opt/webswing; use an absolute directory that is readable and writable by the WebSphere process on your system.
- Unzip the Webswing distribution to
/opt/webswing. Do not remove this directory after deploying the WAR because Webswing uses its configuration and runtime files. - In
/opt/webswing/webswing.properties, setwebswing.server.websocketUrlto the deployed Webswing context, for examplews://localhost:<port>/webswing-server. Replace the host, port, and context root if your WebSphere mapping differs. - Go to IBM WAS Console http://localhost:9060/ibm/console
- Navigate in the menu to
Applications>New Application>New Enterprise Application - Click Choose File and select
/opt/webswing/webswing-server.war. Next>Next>Next>Next>Next- Configure Webswing JVM Properties in location:
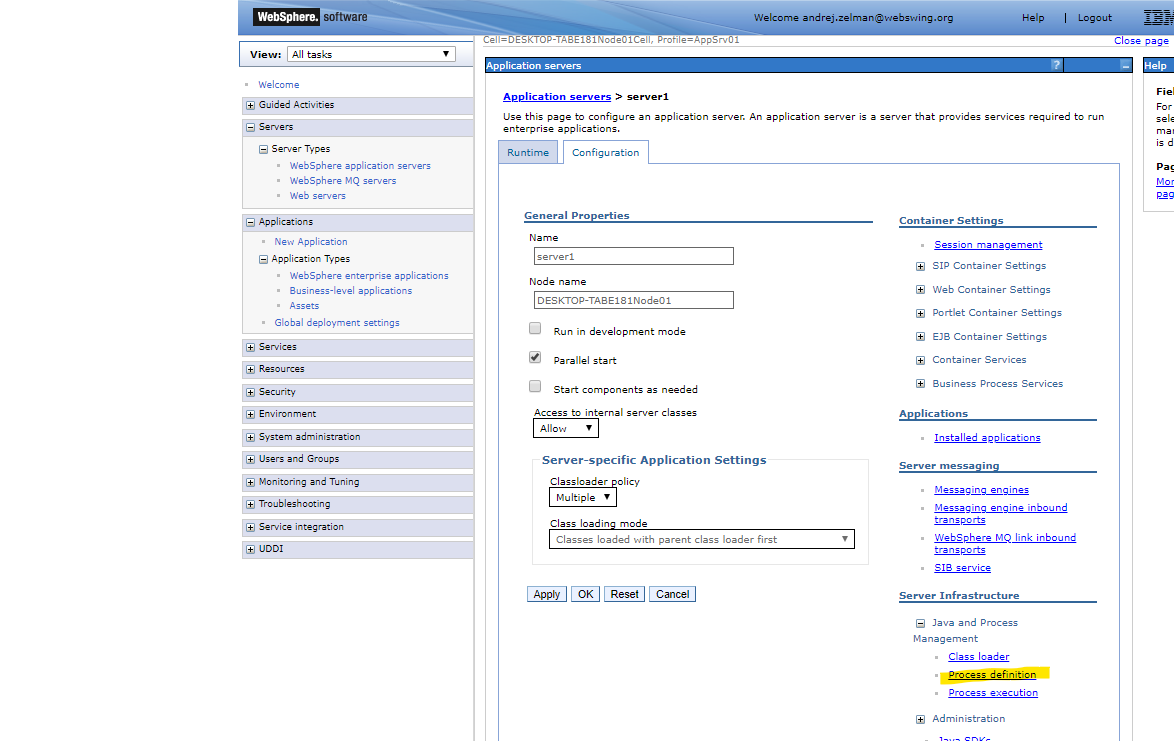
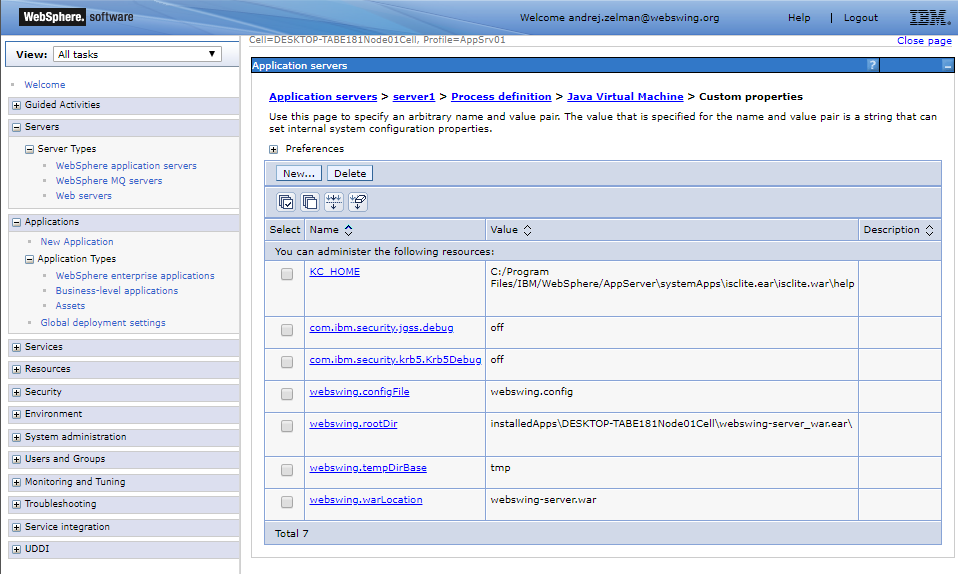
Servers>Server Types>WebSphere application servers>server1>Server Infrastructure, Java and Process Management, Process Definition>Java Virtual Machine>Custom Propertiessimilarly to following:
webswing.warLocation=/opt/webswing/webswing-server.war
webswing.configFile=/opt/webswing/webswing.config
webswing.tempDirBase=/opt/webswing/tmp
webswing.rootDir=/opt/webswing
The demo configuration in the
webswing-examples-evaldistribution uses relative application paths. Adjust those paths for the WebSphere working directory.
In case of issues analyze the logfiles.